Years ago (about 20) I used to run. I never actually ran, it was more like a slow jog, but I entered numerous races. Most races saw me finish way in the back sometimes just in front of the police cruiser with its flashing lights indicating the end of the race. I even received a special Turtle Award trophy for being the last finisher in one race. The longest race I ever ran was a half marathon and I was the last uninjured finisher - but heck I finished!
I did win the women's category in a one mile race once but the weather was so bad that only 3 women entered the race and the other 2 dropped out before finishing the mile.
After we moved from Charleston to Columbia SC I tweaked my knee - probably because Columbia wasn't flat like Charleston and the hills were not kind to the joints-and I gradually stopped running.
Here we are 20 years later (and back in flat Charleston) and I got a bug that I wanted to try to run again. I know that just walking is better on the joints but I never could get enthused about just taking a walk around the neighborhood.
I came across a program called Couch to 5K on the Cool Running.com site and decided to give it a go. It's a 9 week program that starts with more walking than running. Week one had intervals of 90 seconds of running followed by 60 seconds of walking. Each successive week has more running and less walking until one builds up to 35 minutes of straight running - presumably enough to complete a 5K in a timely manner.
When I first started the program I got to week 2 and my knee started bothering me. I immediately went to the doctor who prescribed physical therapy. I learned lots of great stretches and strengthening techniques and the knee feels pretty good now. I restarted the program at week one and am now 6 weeks in.
I don't have a race goal in mind to test my new found 5K abilities, but need to schedule something just to keep me motivated.
See you on the roads!
Saturday, August 28, 2010
Sunday, August 22, 2010
9 years ago
Noah was born 9 years ago today.

I remember that day so well. We were living in California and waiting anxiously to hear that he had arrived safely. We didn't get to Charleston to see him for a week and it was so hard to miss so much of his infancy.
He decided on a slip & slide party so we set that up, filled up a bunch of water balloons and got out the water guns. It has been so hot and humid that when I brought the camera out for photos the lens fogged up. I didn't realize it as I was taking the photos so that's why some of these photos look blurry.


He shares his birthday with his Aunt Heather who turned 21 today. Her party may involve some slipping and sliding, but not the same kind as Noah's!
Happy Birthday Noah (and Heather)!
Monday, August 16, 2010
Beach Retreat 2010
Every year my guild, Cobblestone Quilters Guild, holds its annual beach retreat on Seabrook Island. This year's retreat started this past Friday and ran until today. We had rain on and off all weekend so we couldn't spend the time on the deck overlooking the ocean like usual, but it was still a great time. (click photos for larger view)

We always have a snack table which is loaded down with a variety of tempting goodies.

Lots of beautiful projects were worked on. My table mate, Frances, did this detailed paper pieced Dogwood.

She nearly ran out of the blue fabric for the sky. This is what was left when she finished the piecing.

There were so many beautiful quilts in progress through the weekend and I'm sorry I didn't get photos of most of them. Here are a few I was able to photograph.
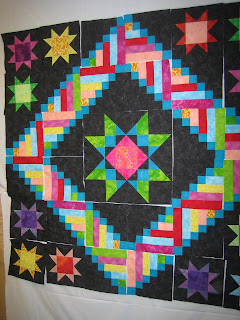
Here is Karen's Monterrey Medallion. There were 3 others finished at retreat but I didn't get photos. Each looked so different because of the different color palette.

Janice's wall hanging

Betsy's Ohio Square Dance

Betsy's snowman

Sheila's

Marva's. For some reason I can't get this photo to orient the right way but I wanted to share this cool quilt. I loved the fabric gradation.

I also worked on a Monterrey Medallion. I started later than the others so am nowhere near done with mine. The red in the quilt doesn't seem so strong in person. Wish I'd seen how it reacts in the photo before I sewed all those blocks! I would have changed it.

We always have a snack table which is loaded down with a variety of tempting goodies.

Lots of beautiful projects were worked on. My table mate, Frances, did this detailed paper pieced Dogwood.

She nearly ran out of the blue fabric for the sky. This is what was left when she finished the piecing.

There were so many beautiful quilts in progress through the weekend and I'm sorry I didn't get photos of most of them. Here are a few I was able to photograph.
Here is Karen's Monterrey Medallion. There were 3 others finished at retreat but I didn't get photos. Each looked so different because of the different color palette.

Janice's wall hanging

Betsy's Ohio Square Dance

Betsy's snowman

Sheila's

Marva's. For some reason I can't get this photo to orient the right way but I wanted to share this cool quilt. I loved the fabric gradation.

I also worked on a Monterrey Medallion. I started later than the others so am nowhere near done with mine. The red in the quilt doesn't seem so strong in person. Wish I'd seen how it reacts in the photo before I sewed all those blocks! I would have changed it.

Monday, August 02, 2010
Roller Derby
Did you know that Charleston has a Roller Derby league? We attended one of the matches last Saturday night. Jerry got us VIP tickets (there are VIPs that go to Roller Derby??) so we were in the special seats and our meal and drinks were included. There were more people in the stands than I expected and it was an interesting group of people.

Craig & Chrystal came with us.

It was an interesting experience but I'm not sure I'm in a hurry to return. Maybe we'll go back when Hayden joins the team.


Craig & Chrystal came with us.

It was an interesting experience but I'm not sure I'm in a hurry to return. Maybe we'll go back when Hayden joins the team.

Tuesday, July 27, 2010
Bras
We had a lively discussion today about putting on bras. According to the "experts" this is the proper way:
1. Adjust the straps to the maximum length.
2. Lean forward into the cups and rest your breasts into the supports.
3. Reach behind to hook the bra on the middle hooks of the closure.
4. Put the straps on your shoulders.
5. Position your breast in the cup by slipping a hand into the cup and lifting the breast while aligning the underwire on your ribcage along the natural crease of your breast to prevent pinching of the breast tissue.
6. Tighten the straps so that they support the breasts lightly without cutting into the skin or putting too much strain on the shoulders.
7. Adjust the straps every time you put on a bra
We polled 13 women (including the waitress at lunch!) and discovered that it's a fairly even split between those that put on their bras the "proper" way and those that fasten the hooks from the front and then spin it around - although there were slightly more spinners.
How do you put on yours? (I'm a spinner)
Friday, July 23, 2010
ongoing projects
Back at the beginning of the year a few of the TTT group decided they'd make a quilt called Vintage Christmas. They asked me if I wanted to join in and I decided I liked the pattern so I'd make one too. The pattern is very traditional; not my usual style. I've been joking that my friends are putting me inside the box when I work on a traditional pattern
We've been meeting once a month and working steadily. At our last meeting 2 of us had the blocks sewn together. I didn't get a photo of mine, but here is Joanne's. (click photos for larger view)

Another project that a lot of the TTT gang is working on is called Monterrey Medallion.
Again, Joanne is the first to get hers pieced.


She liked working on this so much that she's making another one for her daughter.
This is the center for the 2nd one.

I decided to work on this one as well but wanted to have a brighter color palette. This is my center.

My quilting buddies have been working on a few other items. Virginia, who is our resident applique expert, is working on a quilt in conjunction with Karen. Virginia will do all the hand work and Karen will quilt it. I know that having both of them collaborate on a project will result in a spectacular quilt so I'm anxious to see the final product.

Ginny made this attic window quilt for her daughter. She was working on adding some subtle beading to the quilt.

Sunday, July 18, 2010
Baby face
Look what we found on-line today. A high school photo of Jerry. Wasn't he cute? And look at that curly hair!

Someone from his high school class has posted photos of all the graduates on a website. He didn't have a graduation photo taken so we're guessing they took this from his 11th grade yearbook. Since we don't have this photo, it was especially fun to see it. Wish I could get a good quality copy.
Can you still see that baby-faced guy in this next photo? I can.

Saturday, July 10, 2010
They never grow up!
Jerry, Craig and several of the guys they work with have decided to enter a race known as the 24 Hours of LeMons. Not Le Mans, but Lemons. The race is for cars that cost $500 or less and they hold Lemons races around the country. The guys are shooting for the race scheduled in September here in South Carolina.
There are always more applicants than openings so they first need to be accepted. While waiting to hear if they're officially in they've purchased a car - and they found one here locally that was actually used in a previous race. Today they picked it up and luckily for me (and our neighbors) they've parked the car in Craig's back yard.
.jpg)
.jpg)
.jpg)
They haven't decided yet on a team name and how they'll personalize the car but I'm thinking that there really is no way they'll be able to make this car look good. What you can't see in these photos is that there is an additional engine in the back seat - they got this beautiful car with not 1 but 2 engines all for $500. What a bargain! (and they NEED that 2nd engine because the one under the hood has a blown head gasket.)
It's going to be an interesting couple of months.
Friday, July 09, 2010
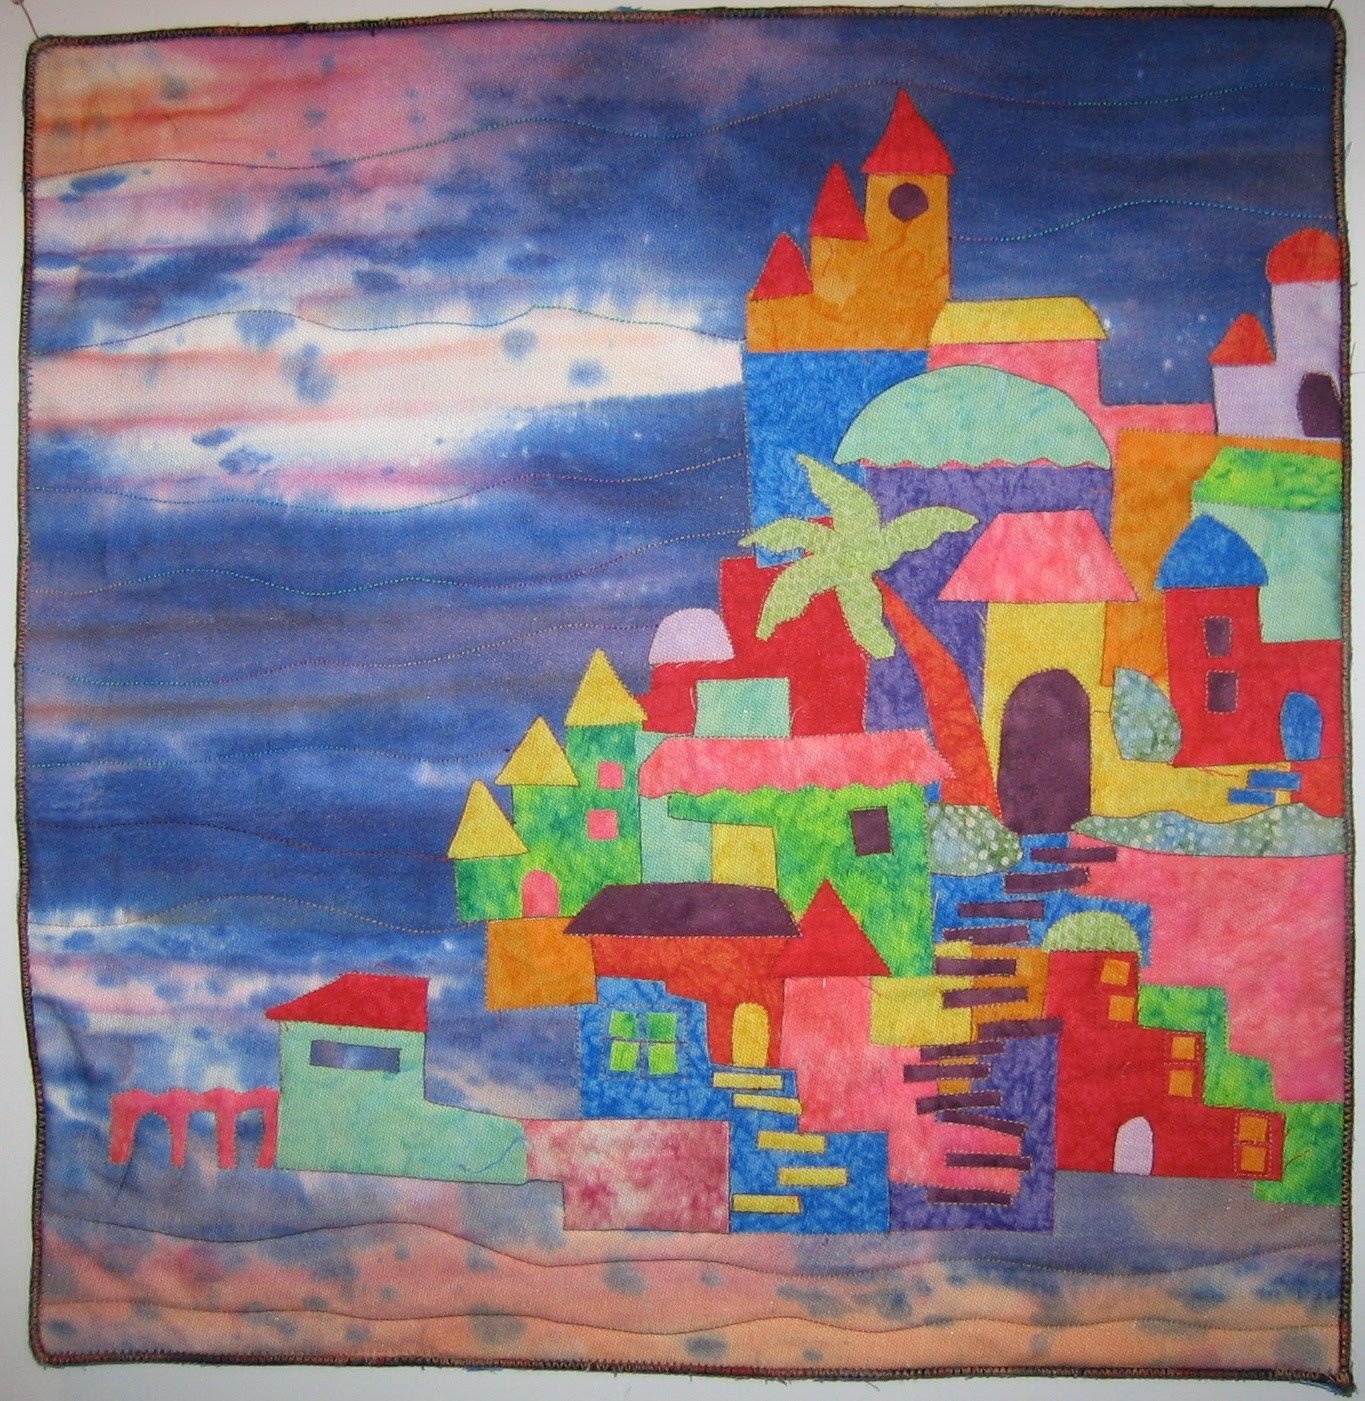
Village By The Sea
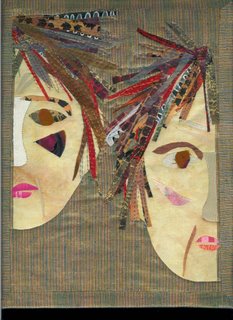
A month ago several of us attended North Carolina Quilt Symposium. One of my classes was called Happy Villages with Karen Eckmeier and I finished my class project the other day. It was really fun making our villages.

This is about 16 x 16.
This is about 16 x 16.
Saturday, July 03, 2010
Stripes
I finally decided on borders for my orange striped quilt. I like how it turned out.

I've had such fun making these mitered stripe blocks that I keep buying more striped fabrics. Last week I ended up with 3 new fabrics to try out. I'm guessing it's kind of like when the stack & whack quilts first came out. For a while I looked at every fabric with an eye to make a S&W. Did the same thing with the 4 patch swirl and will probably do it with these stripes for a while.

I've had such fun making these mitered stripe blocks that I keep buying more striped fabrics. Last week I ended up with 3 new fabrics to try out. I'm guessing it's kind of like when the stack & whack quilts first came out. For a while I looked at every fabric with an eye to make a S&W. Did the same thing with the 4 patch swirl and will probably do it with these stripes for a while.
Saturday, June 26, 2010
Noah's first quilt
Noah and Hayden hung out with us today and Noah decided he wanted to take a stab at making a quilt. We pulled out a box of fabric and he selected several pieces that he liked. I cut the fabric into 6.5" squares. I was going to have him cut the squares with scissors but in the interest of time I rotary cut the squares for him.
He arranged the blocks on my design wall and once he was happy with the layout he stitched them together.

My sewing machine has a speed control that we set at about half speed which turned out to be a good speed for him. It also has a 1/4" piecing foot with a flange. The fabric edge is butted up against the flange which helps keep a consistent seam allowance. I don't like using that foot but it worked out well for Noah. Once he got the top sewn together he thought he was done but I explained to him that he still needed to do the actual quilting. That's a project we're going to save for another day. We discussed whether he wanted to add a border but he has elected not to do so.
When we came downstairs from the studio to show Grandpa and Hayden the quilt top Hayden looked at it, ran to Noah and gave him a big hug and said thank-you. She thinks it's for her!
It has been so hot here that inside activities like quilting are preferable to being outdoors. With only a couple of exceptions we've been in the 90's with high humidity every day this month. I think it's going to be a long summer.
Monday, June 14, 2010
Yikes Stripes!
When I was a kid I used to like Fruit Stripe Gum and enjoyed their "Yikes Stripes" commercials. I thought of the commercials when I was taking photos of some projects with striped fabrics.
The latest AQS magazine had an article by Eileen Sullivan on an easy method of making mitered blocks with striped fabrics. I got the magazine in the mail a day before a trip to Mary Jo's the perfect place to find a great selection of striped fabrics. I purchased two identically striped fabrics in different colorways.
Here's the first fabric stitched up and set a couple of different ways. I haven't cut into the 2nd fabric yet - but it's a more pastel palette. (click photos for larger view)

I put these blocks on the wall without any prior planning and upon looking at the photo it's interesting to see how the blocks with the teal really standing out are concentrated in one area.


I like the last setting a lot but I used it already. Before cutting into my new fabrics I remembered that I had an orange striped fabric sitting here which had originally come from Karen's stash. She decided she probably wouldn't make anything from it and gave it to me to maybe figure out a use for it with the intent of donating the resulting quilt to our guild charity.

I really like this orange one and may have to keep this and make a replacement donation quilt. I still have to figure out borders for it.
It has been fun working in stripes.
Monday, June 07, 2010
North Carolina Quilt Symposium
Got back yesterday after spending a great weekend in Charlotte at the North Carolina Quilt Symposium. This was a first time event for me although the symposium has been going on for a number of years. It's an interesting concept in that the event moves round the state of North Carolina yearly with a different guild hosting each year. I understand that usually the venue is a college campus. This year we were on the campus of Johnson & Wales university which is a culinary college.
The class offerings from a variety of nationally known teachers were excellent. The enrollment fee included 2 days of classes and a lecture (as well as food and lodging) It was difficult to decide which classes to take! On Friday Janice, Cindy and I took Happy Villages with Karen Eckmeimer. It was lots of fun constructing our villages.
Here's Janice's village. She plans to add more doors and windows. I like her larger buildings. (click photos for larger view)

Cindy wasn't enjoying her work in the morning but after lunch when her piece started looking like a real village she started to like it. I love her trees.

I don't think my water/sky fabric works in my piece. It's just too dark for my bright buildings although I do like the illusion of a beach at the bottom.

Once the villages are complete we are supposed to top the work with a layer of tulle and perhaps I can use the tulle to tone down the brightness of the buildings.
On Saturday morning all 4 of us (Joanne was with us too) attended a lecture with Carol Taylor whose work has always impressed me.
On Saturday afternoon & Sunday morning I took a class with Robbi Joy Eklow, whom I've "known" online for years. Robbi is part of the Chicago School of Fusing. She shared her technique of fusing (yes there can be more than one way to fuse a quilt top.) I only made a small element in class as I didn't have the right fabrics with me at symposium.

There were a number of vendors at the show and I picked up a cool new (to me)set of rulers. They're called Double Diamond rulers and come in 3.5" and 1.5" widths. Here's their website. Last night I made a sample with each size of ruler. I like the smaller version best but both are kind of neat.

The ribbons at the show were very interesting. Each ribbon had an extra small yo-yo flower mounted to a hair clip. These were meant to be removed by the winner and worn on her name tag so everyone would know she won a ribbon and what color it was. The information cards were clipped onto each quilt with clothespins. Attached to each clothespin was a tiny yo-yo topped with a button. As I walked around the show I noticed that the clothespin yo-yo coordinated with the quilt. Turns out the woman who made them just had a big box of them and once the show was hung she walked around and tried to match the yo-yo to the quilt. She did a great job. Some of them looked like they were made specifically for the quilt.


It was a great weekend and I'm already planning to attend next year - especially since I WON A SCHOLARSHIP for next year's symposium. How cool was that??
Monday, May 31, 2010
Memorial Day
We've just returned from a week at Myrtle Beach - the ultimate tourist trap. It was a fun trip and of course we encountered "interesting" people during the week - including the woman on the beach who had a monitoring ankle bracelet because she had just been released from County (her words). She was visiting the beach with her pet parrot.
We missed seeing the kids while we were away but got some kid time today. They brought our new granddog Nicholas with them and he sure is cute. (click photos for larger view)

He's a lab/corgi mix and looks like a lab but has the short corgi legs. It's a really funny combination.
He's very calm and allows the kids to love on him without complaint.

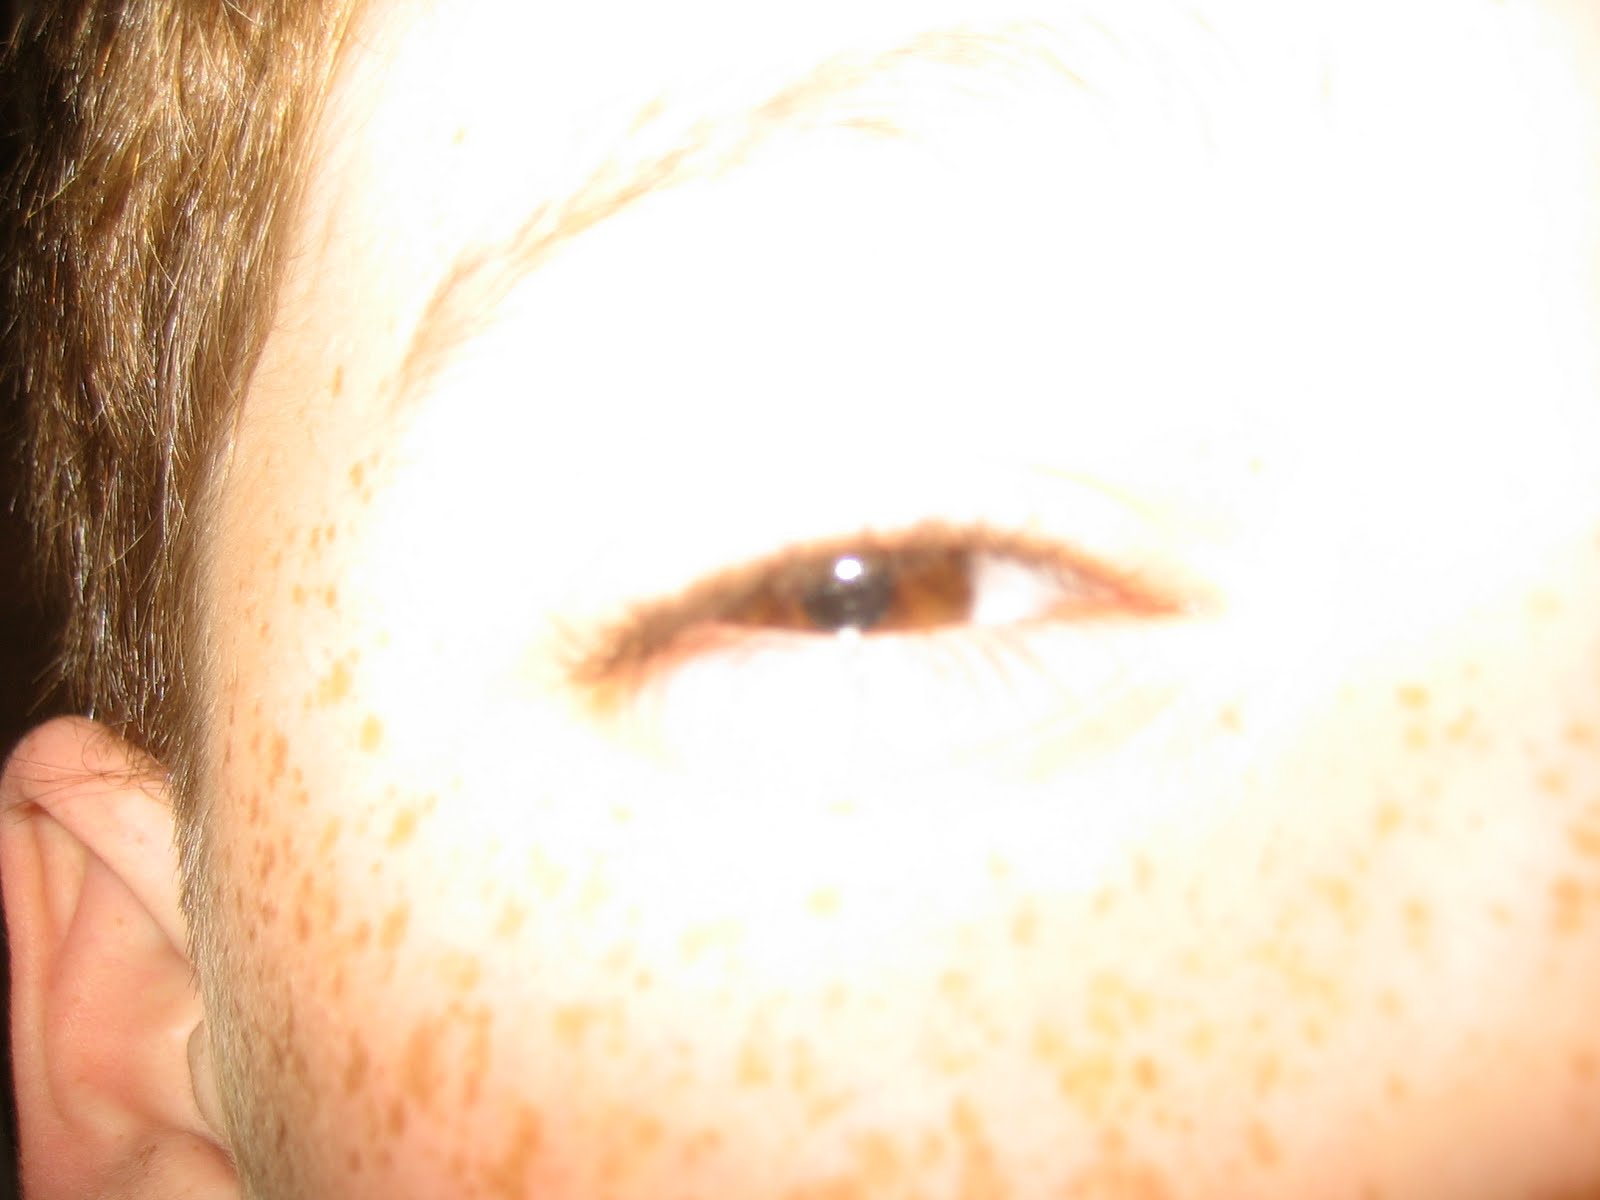
The kids were being silly. Don't you just love Noah's freckles?

Noah kept trying to stick his face in the way of the camera so I fixed him and took an extreme closeup. You can really see the freckles here!

Hayden got upset that she wasn't getting some extreme closeups.

She got her smile back when I stuck the camera in her face.

They liked just hanging out on the back porch.


We missed seeing the kids while we were away but got some kid time today. They brought our new granddog Nicholas with them and he sure is cute. (click photos for larger view)

He's a lab/corgi mix and looks like a lab but has the short corgi legs. It's a really funny combination.
He's very calm and allows the kids to love on him without complaint.

The kids were being silly. Don't you just love Noah's freckles?

Noah kept trying to stick his face in the way of the camera so I fixed him and took an extreme closeup. You can really see the freckles here!
Hayden got upset that she wasn't getting some extreme closeups.

She got her smile back when I stuck the camera in her face.

They liked just hanging out on the back porch.


Subscribe to:
Posts (Atom)